
In the fast-paced world of the Software development, efficiency and collaboration are paramount. This post explores the synergy between Jira automations and Bitbucket, shedding light on how their integration can significantly enhance efficiency in development workflows and comunication with product and support teams.
Integrating Jira with Bitbucket
Requirements
Before proceeding, ensure you have an active Jira Software Project and a Bitbucket repository set up. This guide assumes you are using Jira Cloud.
Step 1: Enabling Code Management in Jira
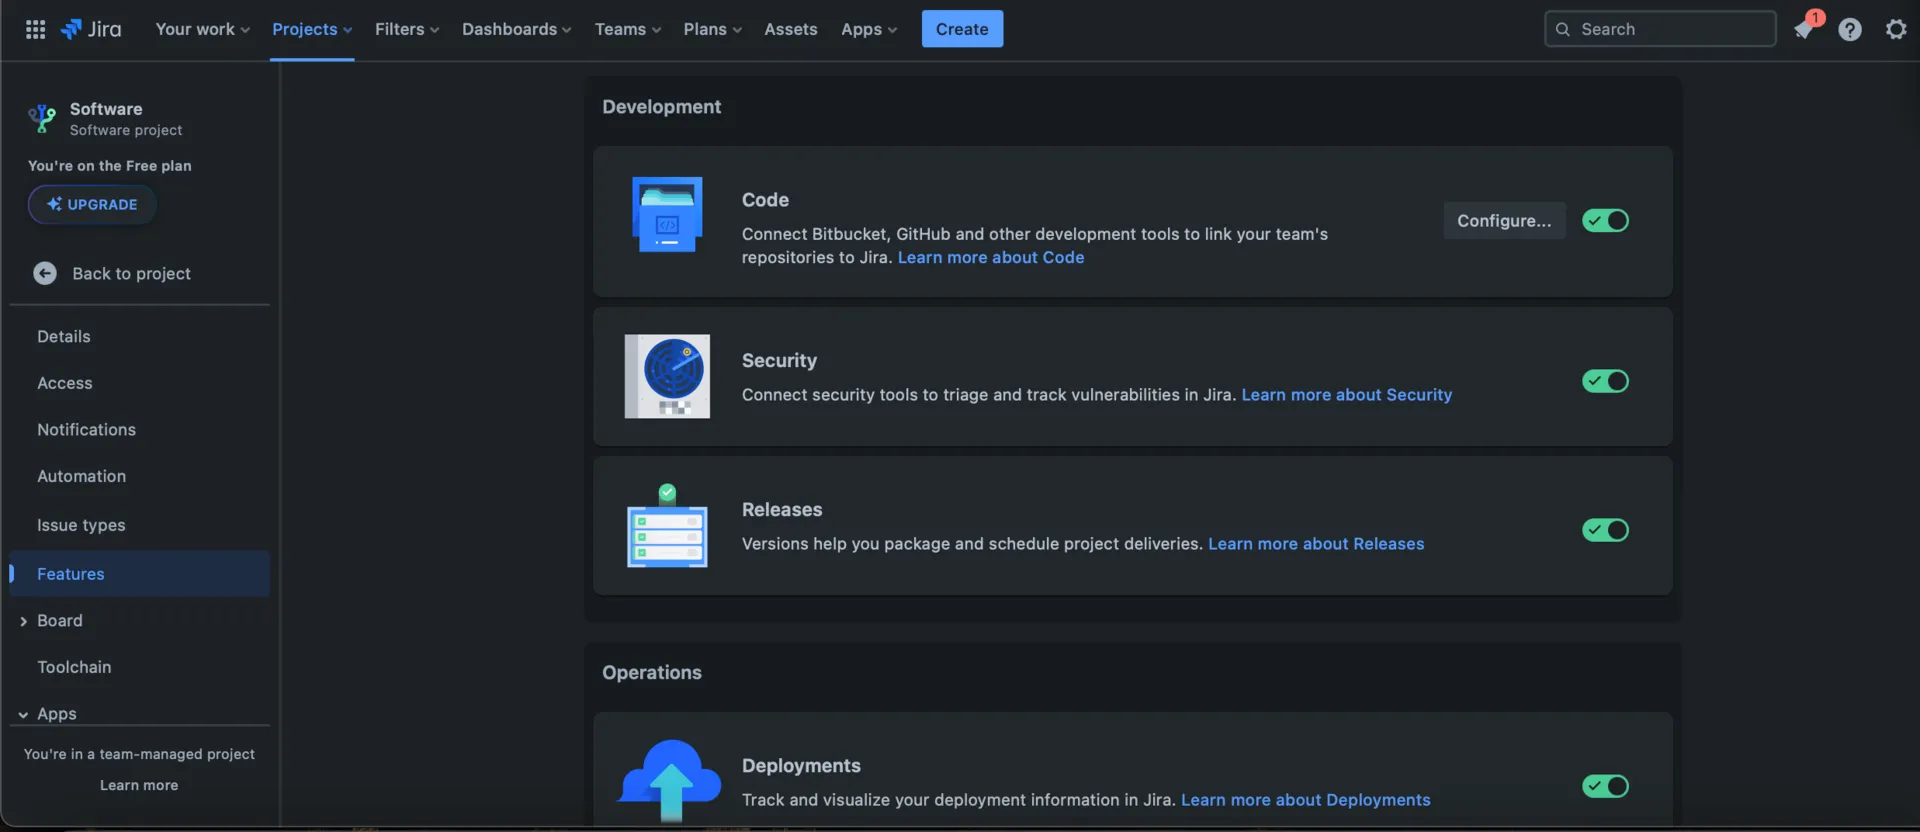
- In your Jira instance, navigate to a Software Project and proceed to “Features”.
- Make sure “Code”, in the Development section, is enabled and click on “Configure.”
- Proceed to click on “Add”, then “Add code repository” and finaly select “Bitbucket”. If you see your repos we are done and can proceed with the next step!
Step 2: Create and Configure Your Jira Automation Rule
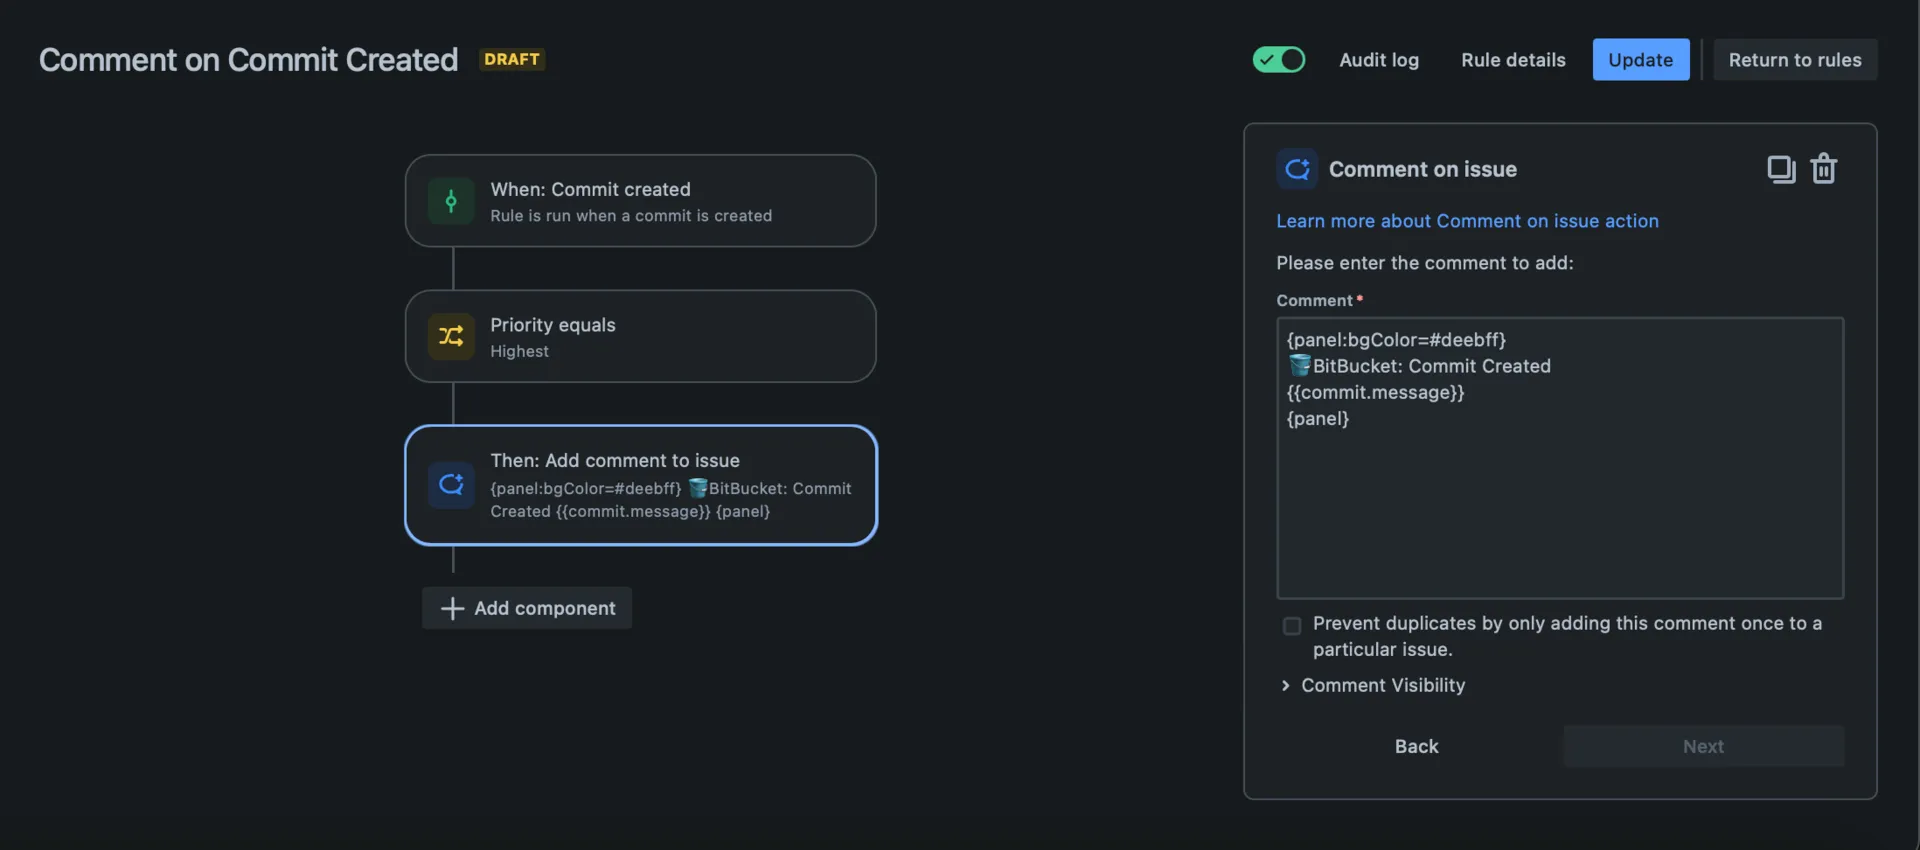
Inside your project go to “Project settings”, select “Automation” and click on “Create rule.” Now we can configure the three main parts of the Automation to make it work:
- Trigger: That will define when the automation rule should run, in our case we will use “Commit created” but build, deployment and pull request triggers are also available.
- Condition (optional): That will filter for us only the issues we need our rule to apply on (eg. Priority = Highest)
- Action: “Comment” That we will now configure in order to show Bitbuket’s data.
{panel:bgColor=#deebff}
🪣BitBucket: Commit Created
{{commit.message}}
{panel}
Edit the comment field using Jira General Smart Values and Jira Development Smart Value.
Now you can save your Automation by clicking “Turn on rule”.
Step 3: Test and Refine

- Test your automation rule by triggering it with a commit, just start it with an Jira Issue Key (eg. git commit -m “JRA-34 Updated .gitignore”)
- Verify that the issue shows the correct notifications as expected.
- Refine your automation rules based on feedback and team requirements.
Benefits of Jira and Bitbucket Integration
- Cost-Free Solution: Eliminate expenses and dependencies on third-party suppliers.
- Enhanced Collaboration: Streamline team communication by seamlessly integrating your commits messages directly into your issues.
- Custom Configurations: Tailor your settings to precisely suit your unique needs.
In conclusion, integrating Jira with the Bitbucket unlocks new possibilities for automation and collaboration. Harness the power of these tools to create a more efficient and responsive software development workflow. Try it out and witness the benefits of seamless communication and automation in your Jira projects!
Additional Resources
Stay Tuned!
Discover more valuable insights by staying connected with BLACKLABS. Follow our blog to stay up-to-date with the latest trends and information. If you found this guide helpful, share it with your network on social media. Let’s together spread knowledge and make a difference!